In this post, I will explain about Validating accounts in Salesforce and how I have implemented it using Process Builder.
Requirement:
Accounts need to be validated by Sales Manager(Office Manager) once the account is created by Sales Rep.
There should be 2 custom fields created: Validated(Checkbox) and Validated by(Lookup to User). Validated flag need to be editable only by Sales Manager, Validated by should be read only and auto populated by the system(with the user who is checking Validated checkbox).
Implementation:
I created the custom fields as mentioned above in Accounts Object.I have given view access to those fields at the profile level only for System admin, but in Sales Manager/Office Manager permission set, I have provided R/W access for Validated checkbox and Read access for Validated by fields.
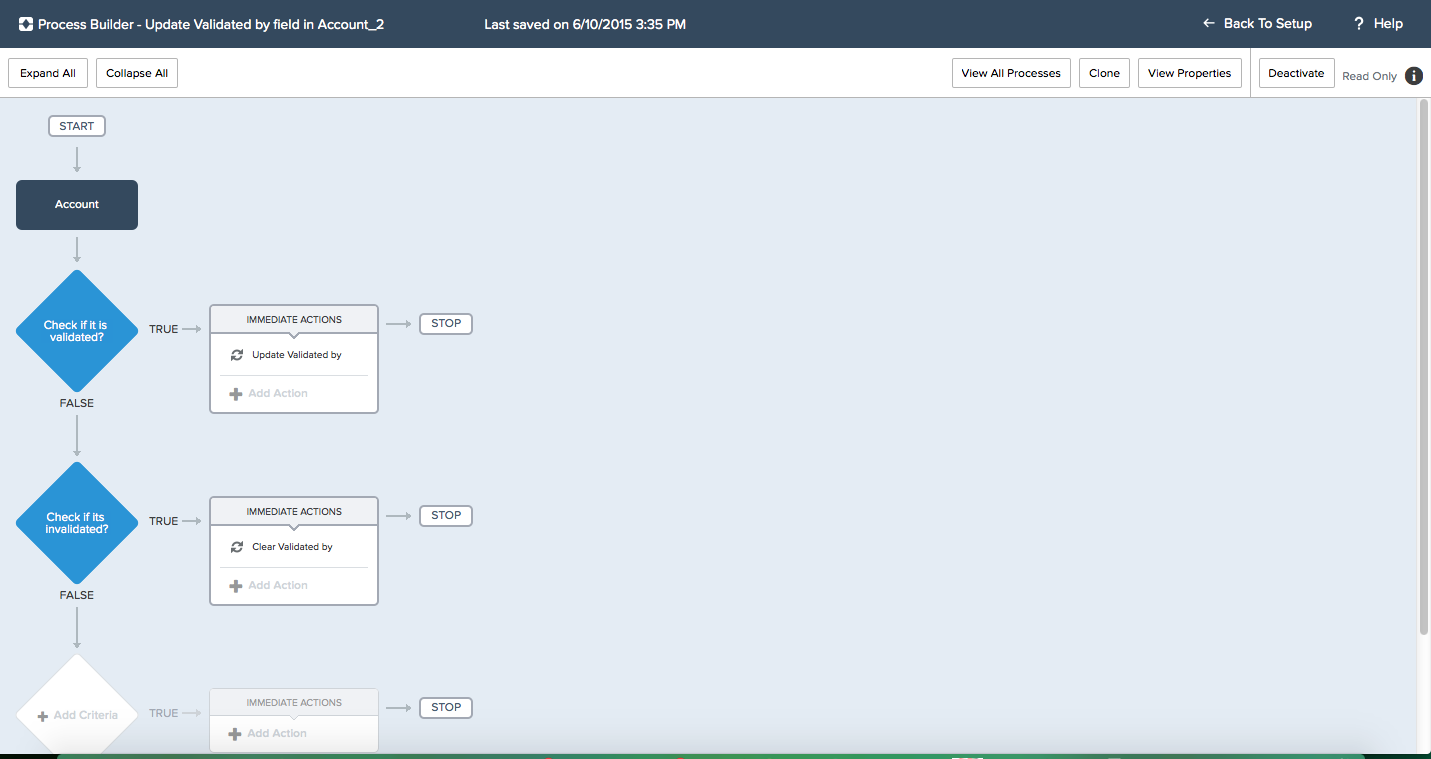
Once the user tick the Validated flag, process will be called and it will update the lookup field Validated by. Screenshots are attached below:


Process should be called only when Validated flag is updated and ticked:

Update Validated by field using Update Records action and update Validated by field using Reference with LastModifiedbyId field:

If the Validated flag is unchecked, clear the Validated by field:


Also, we created a list view in Accounts object for the Sales Manager which will show all the accounts that are not validated.
Moreover, we have updated Validated flag to Y and Validated by to the Sales Manager user Id for all the existing account records by using Dataloader.io tool. We inactivated the process when we ran the update else process would throw the error “Too many SOQL queries: 101”. I have discussed about this error in the post https://getintosalesforce.wordpress.com/2015/10/09/tip13-process-builder-bulkfied/.